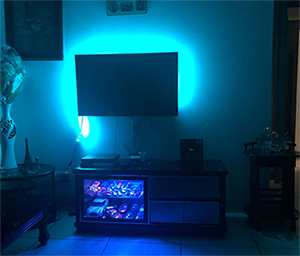
Placing LED backlights behind your television screen isn’t just about the snazzy aesthetic. Bias lighting balances out the brightness level of the TV screen, which leads to improved perception of color and contrast.
This, in turn, helps to minimize eye fatigue and migraine triggered by constantly fluctuating display brightness.
As someone suffering from chronic migraine and light sensitivity, installing LED TV backlighting was a game-changer for me. I wish I had done it sooner.
I’m not exactly the most mech-savvy person around, but I had no trouble setting up these lights all by myself in less than 10 minutes.

Below I have penned down a few tried and tested, foolproof tips to help you stick LED backlighting to any TV model.
But before you get to the installation part, here are a few things to keep in mind to ensure the installation process goes smoothly –
Things to Keep in Mind Before Installing LED Backlighting to TV
- Choose the right LED strip size for your TV. If it’s too long, don’t worry about it. You can always trim the excess.
Most strips will work just fine after cutting as they are made with multiple individual circuits. Just make sure to snip along the clearly marked cutting lines and it will be alright.
- If you don’t wish to stick LED strips behind your TV screen, choose LED light bars instead. Or, choose a light bar that sticks behind the TV.
If you don’t have a led light bar, I totally recommend the Govee led light bar.
Or, go for a light bar that can adhere to the back of the TV screen. Such models can be expensive but they are totally worth the extra bucks if you can afford them.
- Avoid making a loop in the corner while sticking LED strips behind your TV. I have seen a lot of people do that to avoid bending the strip too much.
While loops do achieve the purpose, it can create hotspots in the corner. I’d suggest getting your hands on a bunch of LED corner connectors for the job to avoid bending the strip.
The wires will also let you create custom angles to optimize the viewing experience.
4 Easy Ways to Installing LED Backlighting to Your TV
Step 1: Read the Manual
I know I know, you wouldn’t be reading this article in the first place if the manufacturer’s installation instructions were of any help.
However, it would be still wise to give it a quick scan as some models may call for a specific method of installation.
Step 2: Clean the Surface
This step is of paramount importance if you are going to stick LED strips on the surface behind your TV screen. The adhesives mounting glue won’t adhere to the surface properly in the presence of dirt, dust, and grime.
Step 3: Stick the Light Strip
Once the surface is dust-free, you are ready to stick the strips. Peel the paper off and start pressing the tape onto the surface. Maintain a straight line while sticking the strips firmly to the surface.
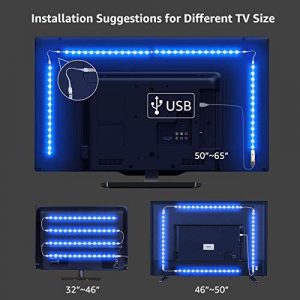
Cover all four or 3 sides, or do a zigzag pattern, depending on the length of the strip.

If you have a little extra tape and there’s a concaving surface at the back of the TV, cover that part too. Make sure the adhesive tapes are sticking securely to the surface.
If you think the strip is too long for your TV, do a dry run first to determine how much length you need to cut off.
If your lights are controlled by an IR remote, make sure the IR sensor on the strip is clearly visible below the TV so that you can point the remote directly at the sensor.
In case of LED light bars, place the lights on both sides of your TV, and plug them to the wall outlet.
Step 4: Plug-in the Lights
If your TV has USB ports, simply plug the USB connector of the light strip or bar into the port or to the wall outlet. Choose your preferred setting and enjoy the sick lighting effect!
In Conclusion
Now, as you can see, that wasn’t difficult at all. If the adhesive tapes are refusing to stick to the surface securely, don’t worry. Buy some adhesive clips to hold the tape in place.
It shouldn’t take more than 10 minutes if you are doing it correctly. If this guide helped, thank me later and if it didn’t, TRY HARDER!
